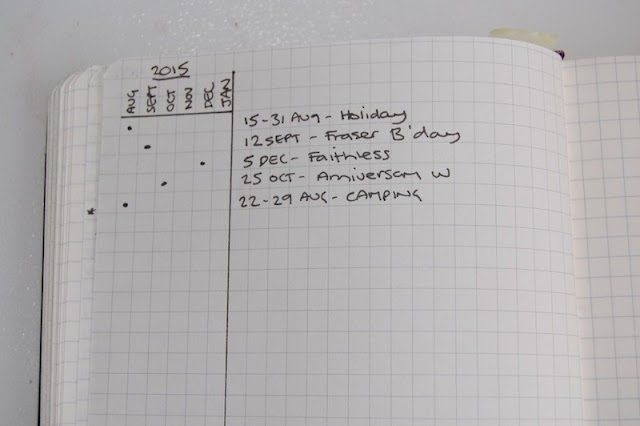
The Future Log is a great idea the bullet journal method uses to keep track of events or tasks beyond the current month. In this installment of the Ultra-Streamlined Style series, we'll cover the Alastair method, found on the official bulletjounal.com website.
In this design, six columns on the outer margin of the page are reserved for months. In this case, six months are logged on the left page of the future log, and six months logged on the right page. When writing a date, simply place a dot in the appropriate month in the margin space and write the details in that same row to the right of the months area. Finding a date is quick and simple, making it easy to copy events from the future log to the monthly module it pertains to.
A commenter on that original post offers a variation using less space. Rather than multiple columns, a single column can do the same job. Instead of using dots, write number of the month. So when you're setting up September's monthly module, just scan the future log for all dates with a 9 next to them.
Also, you can reserve a blank column to separate the month numbers from the event details. That way you don't even need to use a straight edge or draw a line. You can also see a way to work in the future log to your general bullet journal workflow.
Got any other streamlined future log ideas? Comment here. Check out part 1, part 2, and part 3 for streamlined ideas on the monthly module.


Comments
Post a Comment